A deep dive into ember routers - Ember.js Tutorial part 5
Mon Dec 12 2016
Paul Shan
I’m using Ember 2.10.0 here.
In our Ember tutorial series, we’ve covered from scaffolding to Ember’s object model. It’s the part 5 of the series where I’m going to talk about Routers in Ember. I hope you all know about the term routing, which is the process of selecting a path. In the eyes of web applications, it’s as simple as displaying a specific data depending on the url.
Basics on Ember.js Router
I hope some basic examples of routing will help you understand the ember routers and how it works. Below is how you can define a route.
$ ember generate route route-name
The above command will generate a file names route-name.js in app/routes/ folder and also a route-name.hbs in app/templates. If you open your app/router.js file it will look like the following.
import Ember from 'ember';
import config from './config/environment';

const Router = Ember.Router.extend({
  location: config.locationType,
  rootURL: config.rootURL
});

Router.map(function() {
  this.route('route-name');
});

export default Router;
That this.route('route-name'); line is automatically added in that file.
So now, you have a new router called route-name which will display the template route-name.hbs.
Remember to add an {{outlet}} in your application.hbs. Lets
modify the application.hbs like below.
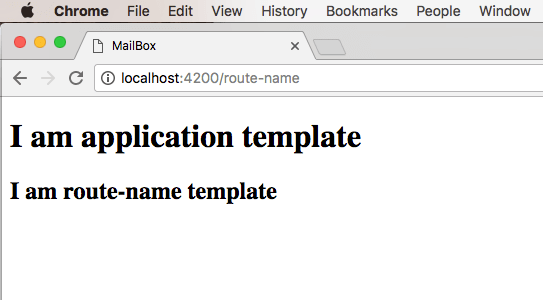
I am application template
{{outlet}}
That {{outlet}} is like an empty place or placeholder where the nested router templates will appear.
In app/templates/route-name.hbs put the following code.
I am route-name template
Now you can run your ember application with command ember s and check the url localhost:4200/route-name/.
Route examples with link-to helper
Let’s create two routes and link them with link-to helper of handlebars. Suppose the two routes are foo and bar.
$ ember generate route foo
$ ember generate route bar
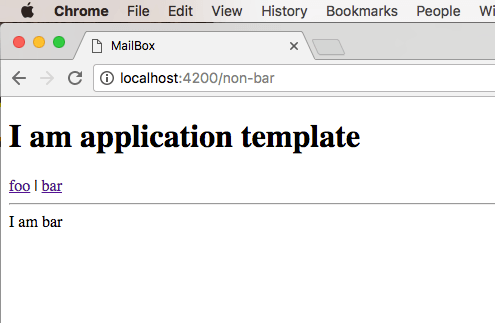
Modify the application.hbs as below.
I am application template
{{#link-to 'foo'}}foo{{/link-to}} | {{#link-to 'bar'}}bar{{/link-to}}

{{outlet}}
The {{#link-to}} helpers work just like anchor tags of HTML. The first parameter it accepts is the route name.
In both foo.hbs and bar.hbs just put I am foo and I am bar respectively.
If you run the ember app now (no need to rerun if it’s already running), you will see in the browser (localhost:4200) that two links named foo and bar are there and clicking them changes the intermediate output.
Modify the path of a router
If we are creating a route foo, that doesn’t mean the url path also has to be foo. You can configure tour route in app/router.js.
I am changing the path of foo as non-foo and the one of bar as non-bar.
this.route('foo', {path: 'non-foo'});
this.route('bar', {path: 'non-bar'});
Now if you click on the foo and bar link in the browser, you will see the url will look like localhost:4200/non-foo and localhost:4200/non-bar.
Nested route
Till now we were learning about simple routes. Now let’s complicate the things a little bit. I will create 2 more routes. One will be new which will go inside the foo/ route. and second one is old to go inside bar/ route.
$ ember generate route foo/new
$ ember generate route bar/old
After running those two commands you will see both in the folder routes and templates, there are two more folders created, named foo and bar; who also contains the newly created routers and their templates. And the app/router.js file has new lines of code.
this.route('foo', {path: 'non-foo'}, function() {
    this.route('new');
});
this.route('bar', {path: 'non-bar'}, function() {
    this.route('old');
});
Now put new html in the corresponding templates and don’t forget to put {{outlet}} in foo.hbs and bar.hbs. Now you will be able to see that two new url routes are functional, which are localhost:4200/non-foo/new/ and localhost:4200/non-bar/old/.
While using {{#link-to}} for nested templates, don’t forget to put the entire route path. For an example if I want to create a link for the bar/old route, I will use {{link-to}} as below in the hbs file.
{{#link-to "bar.old"}}old{{/link-to}}
Following the similar approach you can create more nester routes.
parameterized of dynamic route
Suppose you have a route called emails and in that route you show the list of the emails. Now after clicking on each email you want to display the details of that mail and also want to modify the url accordingly. Then you will need a dynamic route which will make the url like emails/id/.
Suppose I’m going to do this with out bar/old route and will convert it to bar/old/id. To do that we need to change few lines of app/router.js as below.
this.route('bar', {path: 'non-bar'}, function() {
    this.route('old', {path: "/old/:id"});
});
Now the router will have a parameter named id. How to use this param will be discussed later on in this article.
Query params in route
Well, query params is one of the most common ways to send some key-value via the url. Ember creates a two way data-binding with url query params too. But you won’t be able to access those parameters from the router (in ember way). The controller associated can be used to catch and modify the query params. We will give a brief on that in our ember controller article.
Understanding Model
Every template or component wants to display data. And every route can provide them with that data. That data is called model. The routers have a model() hook to fetch the model. Though majority of the tutorials out there tries to teach about models using ember-data, but model works fine with normal objects too. So will provide examples here with normal objects for the ease of understanding and will cover the ember-data separately.
Below is an example how the router provides the model and the template displays it. I am using the route foo for this operation.
route
import Ember from 'ember';

let fooModel = {
    name: "John Doe",
    plays: "Video Game"
}

export default Ember.Route.extend({
    model(){
        return fooModel;
    }
});
template
I am foo
{{model.name}} plays {{model.plays}}
{{outlet}}
The model() hook can also return an RSVP promise and ember will wait till it is resolves and will propagate only when the promise is resolved or rejected.
In case of dynamic routes you can select the model basing on the provided parameter. We’ve already created our bar/old route a dynamic one. So lets see how can we use the parameter id to select model.
bar/old.js
import Ember from 'ember';
let students = [{
    name: "Jack Bauer",
    enrollNo: "1"
},{
    name: "David Palmer",
    enrollNo: "2"
}];
export default Ember.Route.extend({
    model(params){
        return students.findBy('enrollNo', params.id);
    }
});
bar.hbs
{{#link-to "bar.old" 1}}enroll 1{{/link-to}} | {{#link-to "bar.old" 2}}enroll 2{{/link-to}}


{{outlet}}
bar/old.hbs
{{model.enrollNo}} -> {{model.name}}
Now you can check localhost/non-bar and navigate to two different enroll number and appropriate data will be displayed.
The route life cycle
init(): The public function init() will be called at first. Basically it does nothing unless overridden in the class definition.
beforeModel(transition): This hook is called after the init() hook with first parameter as transition. So depending on your requirement, if you want to do some pre model things, such as getting required data to request the model, aborting the transition and redirecting somewhere else etc, you can do that.
model(params, transition): The next public hook is model(), using which you define the model for that route.
afterModel(resolvedModel, transition): This is called after the model() hook is resolved; with the first parameter as the model itself and the second as transition.
setupController(controller, model): You have a hook named setupController() in Ember’s routes where you can tweak the controller instance or the resolved model.
renderTemplate(controller, model): When getting a model and setting up the controller is done, then at the end renderTemplate() hook is called to render the appropriate template.
exit(): When you navigate to some other route, the existing route will call its exit() hook.
deactivate(): This hook will be called once it completely exits the route.
Redirect & prevent
Apart from navigating from the anchor tags or {{#link-to}} helpers, sometimes you need to navigate to some other routes programatically. You can do that in ember’s route instances with its transitionTo() hook.
this.transitionTo('foo', myModelObj);
this.transitionTo('bar.old');
As you can see the first param it accepts is the route. It can also accept a model as its second param and the new route can use that object as its model.
You can also replaceWith() instead of transitionTo(). The difference is, replaceWith() doesn’t maintain a history. So if you are in route foo and made a transitionTo() to bar; you can click the back button of your browser and come back to foo. But in case of replaceWith() it’s not possible.
Aborting a transition
You can abort any router transition if you have the transition object with you. This parameter can be found as a parameter in hooks like beforeModel(), model() and afterModel() as shown in life cycle part. While making a transition Ember calls the willTransition(transition) hook of all active routes including the leaf one. You can also grab the transition object there. Once you have the transition object with you, all you need to do is the coffolown code to prevent the transition.
transition.abort();
With transition object you can also do transition.retry() to retry a failed or aborted transition.
Loading, error and wild route
Loading route
At the time of when model() is still under process fetching the appropriate data with an ajax call or something, you probably want to display a loading animation. Well, ember by default creates loading routes for every router. All you need to do is to assign a template.
Suppose our bar route is taking time to load; in that case if we have a template named bar-loading.hbs or bar.loading.hbs, ember will display that. Use the following code to test it.
app/routes/bar.js
import Ember from 'ember';

export default Ember.Route.extend({
    model() {
        return new Ember.RSVP.Promise(function(resolve) {
          Ember.run.later(function() {
            resolve({});
          }, 3000);
        });
    }
});
app/templates/bar-loading.hbs
Bar route is loading...
We deliberately slowed the model() loading using an RSVP promise. Now you will see, in first 3000 milliseconds the page will display Bar route is loading... text and then the bar template.
Error route
Error route works similar to loading route. All you want is just a routename-error.hbs. Suppose we’re creating error route for bar route. Reject the promise in model.
app/routes/bar.js
import Ember from 'ember';

export default Ember.Route.extend({
    model() {
        return new Ember.RSVP.Promise(function(resolve, reject) {
          Ember.run.later(function() {
            reject({});
          }, 3000);
        });
    }
});
app/templates/bar-error.hbs
There's some error in bar route
After 3000 ms you will find the bar route is showing There's some error in bar route in the browser.
Both Loading and error route pics up the template as per the following priority rule.
- First it searches for
routename-loading.hbsorroutename.loading.hbs. If it finds one it will display. - If the first type of template is not found it will search for
parentroute-loading.hbsorparentroute.loading.hbs. Basically it will keep searching one level up if the loading template is notfound for the current route. It will search tillapplication-loading.hbs. - If none of the above two is found it will search it will search for
loading.hbs. If found it will display, else nothing will happen.
Wildcard route
If you want to catch any route that doesn’t exist; you need to implement your *wildcard route. The code below will also need page-not-found.hbs.
Router.map(function() {
  this.route('page-not-found', {path: '/*wildcard'});
});
Next part
In the next article of this ember js tutorial series we will talk about ember’s components, which is one of the most important aspect of front end web programming.
SHARE THIS ARTICLE


Popular Articles
Authentication using Google's oAuth api with node.js
Thu Mar 10 2016
OAuth authentications are pretty popular now a days and another thing which is popular is JavaScript. This article shows how to plugin google’s oAuth api for authentication in your own node application.CSS3 Loader Snippet Collection: (Part 2 - Squares)
Sat Mar 01 2014
This is a continuation of my CSS3 loader snippet collection series. I've provided spinning css3 animation loader in the part 1 of this series and here in part 2, I'm providing various square type loading