Template syntaxes & helpers - Ember.js Tutorial part 3
Fri Dec 09 2016
Paul Shan
I’m using Ember 2.10.0 here
It’s the third post of our Ember tutorial series. How to start with ember.js has already be covered in part 1 and part 2 and in this post we will talk about the templates in Ember. We will go through all the syntaxes of handlebars, which is the template engine of Ember.js.
Like any other template engine, handlebar’s concept also circles around the code concept of data binding. The handlebars file extensions are .hbs and it looks like a HTML file with some dynamic data in it, wrapped in double curly braces {{}}. The syntaxes have been described below.
{{doubleCurlyBraces}}
With double curly braces, you can display the value of any variable. If at any point the value of that variable gets changed, the new value will automatically be reflected in the DOM.
My name is {{firstName}} {{lastName}}
Let’s make it work in our ongoing application in this ember tutorial series. Modify the application.js controller and application.hbs template as follows.
app/controllers/application.js
import Ember from 'ember';

export default Ember.Controller.extend({
    myVal: "Void Canvas",
    init(){
        setTimeout(()=>{
            this.set('myVal', "Paul Shan")
        },5000)
    }
});
app/templates/application.hbs
Hello {{{myVal}}}
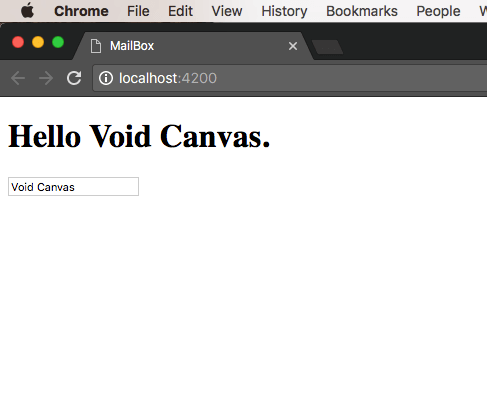
If you check the output in localhost:4200 in the browser, you will find it will display Hello Void Canvas first and after 5 seconds it will be changed to Hello Paul Shan. So, double curly braces not only displays the value, but also changes the value displayed if the original one changes.
Helpers
Before moving to the other template syntaxes, you need to know about helpers, cause most of the remaining syntaxes are nothing but inbuilt syntaxes.
Helper is to Handlebars as function is JavaScript. You can not call a JavaScript function directly from the template, but you can call a helper, which is nothing but kind of a function.
Let’s create a helper named sum.
ember generate helper sum
After running the above command, a helper names sum.js will be generated in app/helpers/. You can put the following code in that file.
import Ember from 'ember';

export function sum(params/*, hash*/) {
    let sum = 0;
    params.forEach(param=>{
        sum+=param;
    });
    return sum;
}

export default Ember.Helper.helper(sum);
Now if you put {{sum 1 1}} in your application.hbs or any other template, it will be displayed in the browser as 2.
You can even use nested helpers.
{{sum (sum 1 1) (sum 2 (sum 3 3))}} //10
So this is how a helper works.
All inbuilt helpers
if, else & unless
{{if amITrue "yes, I am" "No, I'm not"}}
The if helper works as above. the first parameter is the condition and 2nd one is the true statement and the last one is the false one. Just like our custom sum helper you can also use nested if helper.
You can also do block invocation of if helper using a #. Below is an example.
{{#if amITrue}}
    Yes, I am
{{else}}
    No, I'm not
{{/if}}
Block invocation helps to put conditional template.
After if and else, there’s another conditional helper called unless, which is nothing but if not. An example is as below.
{{#unless amITrue}}
    No, I'm not
{{else}}
    Yes, I am
{{/unless}}
each helper
The helper each is used to iterate through an array. Below is an example.
let students = [{
    name: "Sandip"
}, {
    name: "David"
}]
For the array above, we can write an each helper like below.
{{#each students as |student index|}}
    The student no {{index}} is {{student.name}}
{{/each}}
First parameter of each helper is the array to be iterated and the two block parameters are the alias for each array element and the index of that element. Remember block parameters are accessible only inside the helper.
Helper each also comes with an else part, which is executed when the given array is empty.
{{#each students as |student index|}}
    The student no {{index}} is {{student.name}}
{{else}}
    No students found!
{{/each}}
each-in
Helper each-in is very much similar to each helper. Instead of array, each-in deals with an object and the block parameters are key and value consecutively. Below is an example.
let marks = {
    physics: 80,
    chemistry: 70,
    math: 90
}
For the array above, we can write an each helper like below.
{{#each-in marks as |subject mark|}}
    Score in {{subject}} is {{mark}}
{{/each-in}}
Helper each-in also has else like each helper, which is executed if the Object to be iterated has no keys in it.
link-to
This helper link-to works like the anchor tags in HTML. It takes the route name as first parameter. The rest of the parameters depends on the route itself. We will talk in brief about this in the Router tutorial; but for the time being below is a simple example.
{{#link-to "inbox"}}inbox{{/link-to}}
{{#link-to "drafts"}}drafts{{/link-to}}
The two lines above will generate a html like the following.
inbox
drafts
action
action is one of the most important things in ember, cause, the user must interact with the application and the application should also respond accordingly. The action helper is used to capture events like click, mouseUp etc and take appropriate steps after they occur. The action callback must be declared in your JavaScript code and handlebars will just execute that once the user interacts.
In our case, lets write an action in our controller.
import Ember from 'ember';

export default Ember.Controller.extend({
    myVal: "Void Canvas",
    init(){
        setTimeout(()=>{
            this.set('myVal', "Paul Shan");
        },5000)
    },
    actions: {
        triggerMe(){
            alert("I am triggered");
        }
    }
});
Now attach the action in hbs.
Hello {{{myVal}}}.
Once you click on the h1 tag in the browser, the alert will come up with the message “I am triggered”. Remember, the triggerMe function must be inside an object named actions. Ember only considers the functions inside the actions object as proper actions.
You can also pass parameters to the actions. Here is an example.
import Ember from 'ember';

export default Ember.Controller.extend({
    myVal: "Void Canvas",
    init(){
        setTimeout(()=>{
            this.set('myVal', "Paul Shan");
        },5000)
    },
    actions: {
        triggerMe(name){
            alert(name+" is clicked");
        }
    }
});
.
{{#each students as |student index|}}

        The student no {{index}} is {{student.name}}
{{/each}}
action is not just for click. It can be for any event. You just have to mention that with on attribute.
Hello {{{myVal}}}.
input helpers
For input fields like, textbox, checkbox, radio etc, you can use the input helper of ember. Below are few simple examples to make you understand the basic of it.
{{input value="http://www.voidcanvas.com"}}
{{textarea value="http://www.voidcanvas.com" cols="80" rows="6"}}
{{input value=myVal}} //for two way binding
{{input value=(sum 1 1)}} //2
If we change our application.hbs with the following code, you will see the myVal is reflecting whenever changes.
Hello {{{myVal}}}.
{{input value=myVal}}
To invoke an action you need to code like below.
{{input value=myVal key-press="updateMyVal"}} //hit enter
There are many other attributes supported for input helpers. You can find them in ember-guide.
Next Part
After this article hope you are able to write simple templates and know how the binding etc works. In the next part of this series of ember tutorial, we will talk about Objects in Ember, computed properties and observers.
SHARE THIS ARTICLE


Popular Articles
Authentication using Google's oAuth api with node.js
Thu Mar 10 2016
OAuth authentications are pretty popular now a days and another thing which is popular is JavaScript. This article shows how to plugin google’s oAuth api for authentication in your own node application.CSS3 Loader Snippet Collection: (Part 2 - Squares)
Sat Mar 01 2014
This is a continuation of my CSS3 loader snippet collection series. I've provided spinning css3 animation loader in the part 1 of this series and here in part 2, I'm providing various square type loading